Following up on part one of our intro to version control, this week we learnt how to use a popular git web service to work with other people, including pull requests and code review.
You can get the slides for the talk here
Outline
- Recap
- Workflows
- Merge requests
Recap part 1
Glossary
- repository/repo: a project under version control
- diff: a set of changes between two files or versions of files
- commit: a saved “box of diffs” in the repo, or snapshot of the repo at a given time
- working tree: a project as it currently looks like on disk
(i.e. what you see with
lsor in your editor) - index: the “staging area” or box of diffs
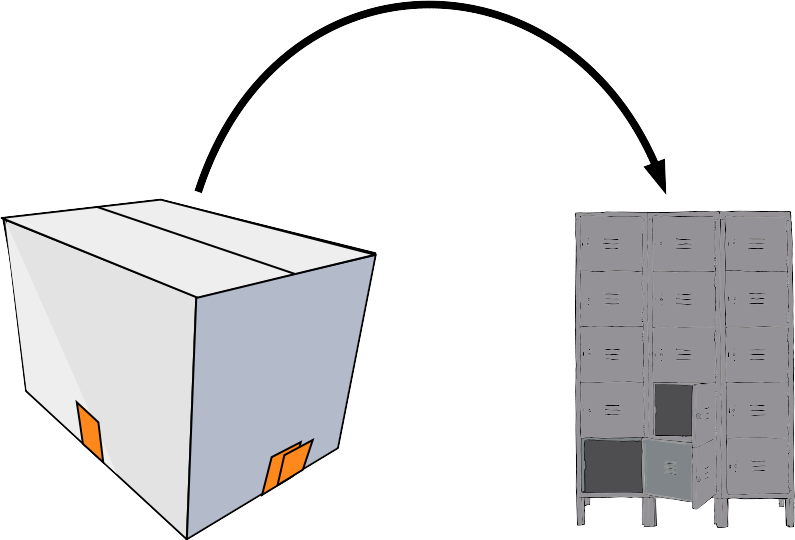
The gist of git
The building blocks: diffs
- Shows differences between individual lines
- Lines beginning with “
-” have been removed - Lines beginning with “
+” have been added - Changed lines are shown as removal plus addition
The gist of git
Add diffs to a staging area

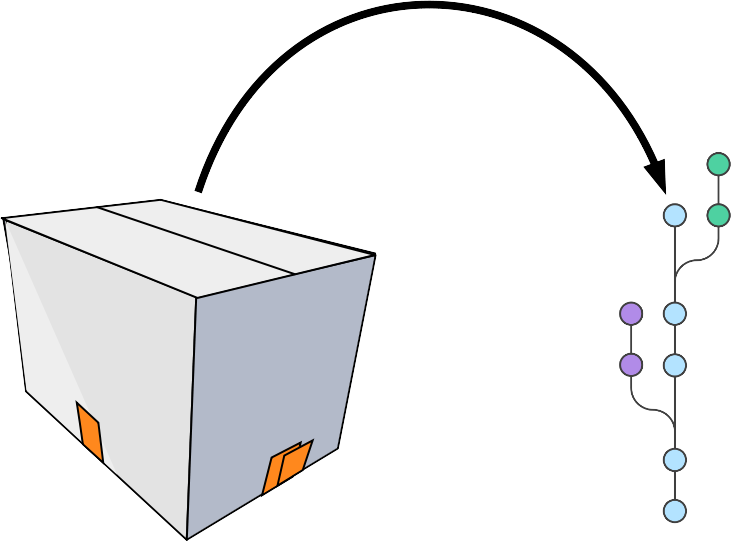
The gist of git
Commit the staging area to the repository
The gist of git
Commit the staging area to the repository
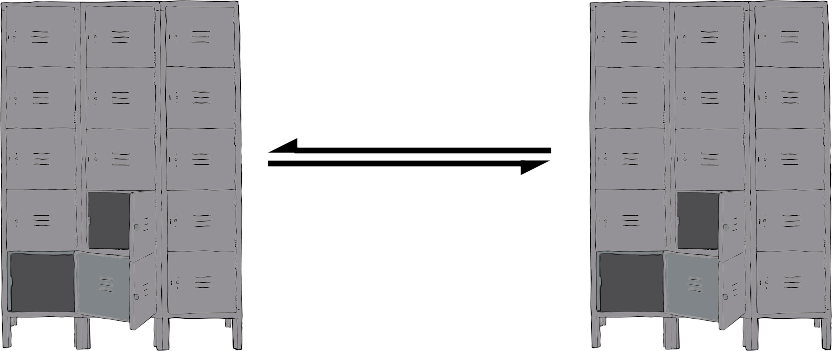
This gist of git
Sync with other people’s repositories
The basic commands
##
$ git status                # Current status of working tree
$ git add <file>            # Stage a file
$ git commit                # Make a commit
$ git log                   # View history
$ git checkout -b <branch>  # Checkout a new branch
$ git checkout <branch>     # Checkout an existing branch
$ git merge <branch>        # Merge a branch into this one
Merging
Fixing conflicts
- Conflicts happen when both branches touch the same line(s) in a file
- Conflicts are marked with a diff-like syntax
- To resolve the conflict, just go to the conflicting files and edit them appropriately
-
There are lots of tools that can help you with this, e.g. ediff, meld, diff3
<<<<<<< HEAD line changed in branch1 ======= line changed in branch2 >>>>>>> merging branch - Just delete all the special markers and the lines(s) you don’t want to keep
- Sometimes you want some combination of both regions – just edit the lines to keep what you want
- You can bail out of a merge with
git merge --abort
Getting started with Bitbucket
Signing up
- Sign up with York email address to get academic account
- Two steps: sign up for Bitbucket account, and then get a username
- I know, it’s weird
Getting started with Bitbucket
Make a repository on Bitbucket
- Click the big
+on the left - Click “Repository”
- Give it a name and decide if you want it public or private
- Make sure “Include a README” is unticked
- Click “Create repository”
Add the remote repository
- Follow the instructions on Bitbucket:
# Add the remote
$ git remote add origin https://bitbucket.org/<username>/<reponame>.git
$ git push origin master
git commands
git push
git push: Update remote refs along with associated objects- Glossary “remote”: a version of this repository that is located elsewhere
- Glossary “refs”: reference to some git object (normally a branch)
- Glossary: “tracking branch”: a local reference to this branch on a remote repo
Getting started with Bitbucket
Getting remote changes
- From the three-dot menu in the top right, click “Add file”
- Name the file “README.md” and some text
- Click “Commit” in the bottom right
- Now we need to get this file in our local version…
-
The quick way:
$ git pull
git commands
git pull
git pull: Fetch from and integrate with another repository or a local branch- If the branch has a tracking branch (i.e. is linked to some branch
on a remote), then
git pulldoes the Right Thing - Otherwise, specify remote and branch:
git pull <remote> <branch>
Ways of working with others
“Mainline”
- Everything straight into master
- Ok for very small teams or Google
Feature branches
- Changes made in separate branches
- Good for teams
- Pull request for merging from your branch into another branch
Fork
- A fork is a copy of a repo
- Good for open source projects without fixed developers
- Pull request for merging from your repo into theirs
Gitflow
The whole kit and caboodle

Pull requests
Pull/merge requests are great
- Get a chance for code review
- Super important!
- Can run tests automatically
- Tests are great, automatic tests are better
- Lots of services for running tests automatically
- Jenkins, Travis, Bitbucket pipelines
Forking
- Fork the example repo:
https://bitbucket.org/ZedThree/coding-club-pull-request-tutorial
- Big plus on the left hand side, at the bottom
- Clone it to your computer
- Run
pip3 install --user -r requirements.txt - Run
pytestto check everything works - Add upstream as a remote
- You don’t have write access to upstream but you can pull changes
- Make a new branch
- Add a file called
<your_name>.py, and a test file,test_<your_name>.py - Add a simple function and test
- See
test_simple_calc.pyfor example
- See
- Run
pytestto check it all still works - Push to your repo
- Go to upstream and open a pull request
- Review your neighbour’s PR
Dealing with problems
Quick and dirty
- Looked at merge conflicts before
- But now trickier problem: conflicts on same branch!
- Can try
git pull --rebase - Will try to rebase your commits on top of the remote ones
- If that goes wrong:
git rebase --abort
Dealing with problems
A bit more complicated
- You’ve started working on
masterinstead ofmy_branch - Now you and
originhave made lots of commits - Find the commit where you diverged, then:
$ git checkout -b temp_branch
$ git checkout master
$ git reset --hard <commit>
$ git pull
$ git merge temp_branch
The universal “get me out of trouble” solution
This will (almost) always get you out of sticky situation
$ git checkout -b wip_branch
$ git add <changes>
$ git commit                  # These first three if necessary
$ git checkout <problem branch>
$ git checkout -b fix_problem
<do whatever it was you were trying to do until it works>
$ git branch --move <problem branch> <temp name>
$ git branch --move fix_probem <problem branch>
Further reading
- Git book: https://git-scm.com/book
- Atlassian tutorial: https://www.atlassian.com/git/tutorials
- Codecademy: https://www.codecademy.com/learn/learn-git