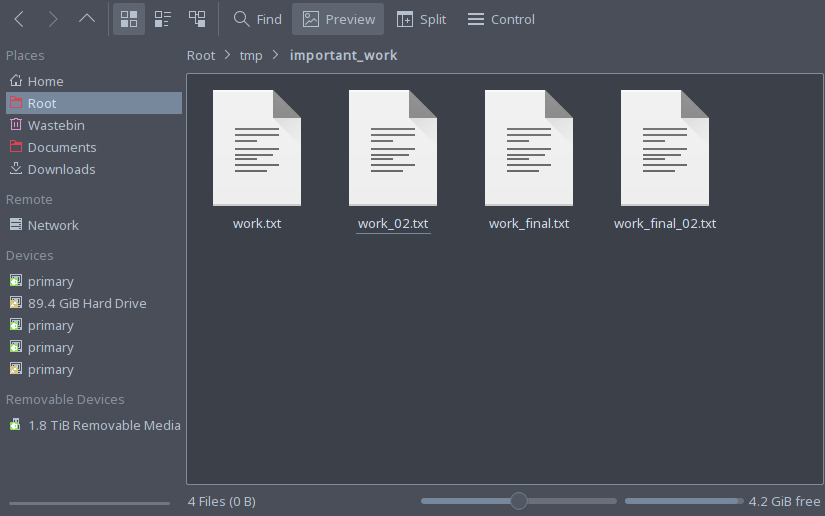
ImportantWork_final_v5_changes_v2_really_done (1).txt. Look familiar?
You need to change something, but want to keep the old version, just
in case… There’s no shame in admitting it, we’ve all done it! But
there has to be a better way, right?
This week at Coding Club, we have our first practical session of the term, with an introduction to version control – an essential digital skill and useful for more than just code. We’ll be going over the basics, including getting started with a web service for sharing projects. You’ll come away confident enough to use version control for everything.
The original slides for this session are here
(This is revisiting our annual version control practical)
Outline
- What and why version control
- Basics of git
- Using a web service
What is version control?
- Version control systems record changes to a file/set of files over
time
- Not just software! This talk is under version control
- Allows you revert files back to a previous state, compare changes over time, see who last modified something, etc.
- Instead of keeping multiple copies of the same file, normally just store the differences (“diffs”) between versions of the files
Why is version control important?
- Tracking versions
- Know instantly which is the latest version
- Roll back to previous versions
- See history of project/file/line
- Find out when bugs were introduced
- Maintain/compare different versions
- Coordination between developers
- Easier to keep track of when changes are made
- Easier to work on separate features
- Easier to merge distinct changes from separate developers
- Easier to resolve conflicts on same features
- Tracking who made what changes
If it’s not under version control, it doesn’t exist!
The gist of git
The building blocks: diffs
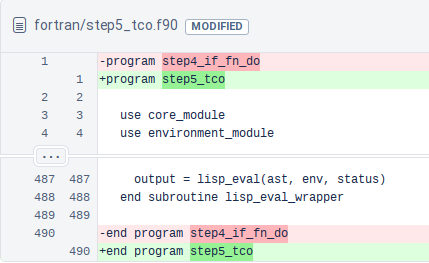
- Shows differences between individual lines
- Lines beginning with “
-” have been removed - Lines beginning with “
+” have been added - Changed lines are shown as removal plus addition
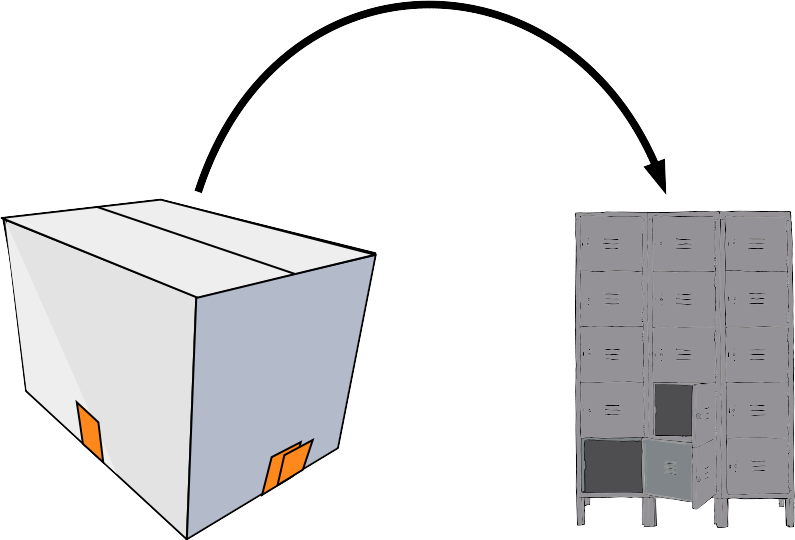
Add diffs to a staging area

Commit the staging area to the repository
Commit the staging area to the repository
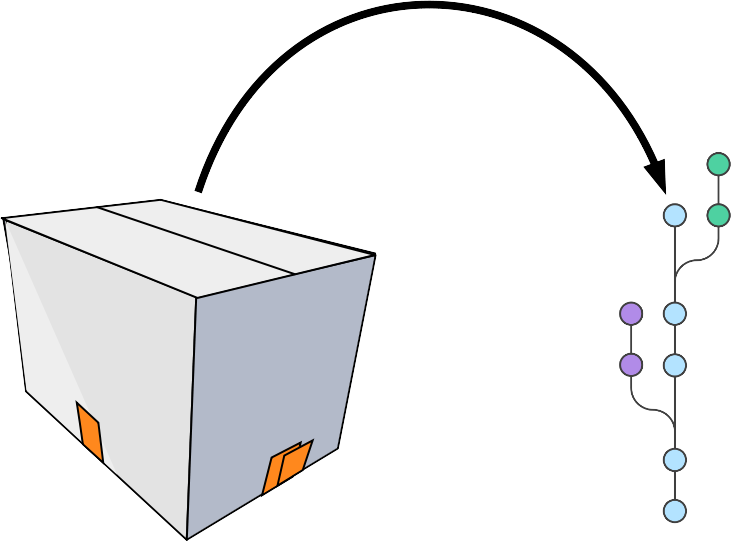
Sync with other people’s repositories
Using git
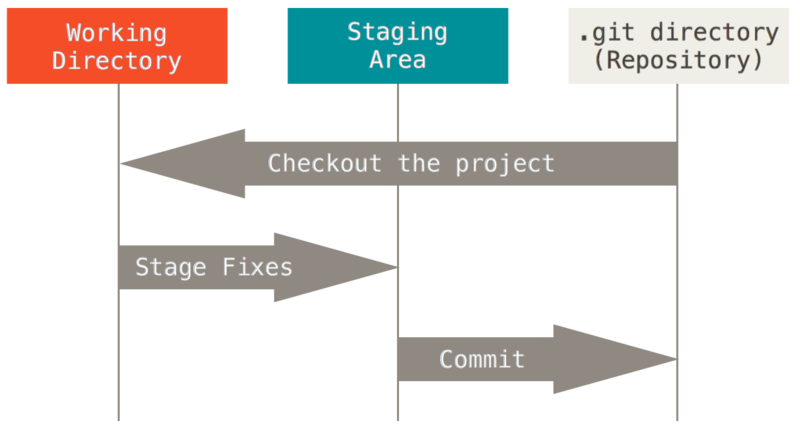
The Three Stages
- Important to understand correctly
- Three main states that files can be in:
- Committed: data stored in repo
- Modified: file is changed but not committed
- Staged: modified file marked to go into next commit
 {width=90%}
Graphical interfaces
For Mac and Windows:
- Sourcetree: https://www.sourcetreeapp.com/
For Linux:
- git-cola: http://git-cola.github.io/
For Emacs:
- magit: https://magit.vc/
Today’s toolkit
What you’ll need
- Linux
- A terminal
- A text editor
- Optionally: a file browser
Before we begin…
…a little bit about yourself
-
We need to give git a little bit of information about ourselves:
$ git config --global user.name "Your Name"
$ git config --global user.email your.email@example.com
Replace
"Your Name"with your name, andyour.email@example.comwith your email address. -
This sets the “global” name and email, but you can also set it individually for each repository
- Useful to separate work and personal repos!
First steps
Making a repository
-
We need to create a repository first
$ mkdir my_git_test $ cd my_git_test $ git init - Let’s see what it looks like
-
What do you see after typing each of the following commands?
$ ls
$ ls -A
$ git status
Getting help
$ git <command> --help
git status
git status: Show the working tree status- Glossary “Working tree”: what the repository directory looks like, including any changes
- Going to be our most used command today!
- Use it whenever you’re not sure what’s going on
Initial commit
- Add some text to a new file and save it in your repository
- What does
git statusshow now? - Follow the instructions to add your new file to the staging area
-
Check
git statusagain$ echo "Some text" > newfile.txt $ git status $ git add newfile.txt $ git status -
Now we need to actually commit our commit
$ git commit - Your default editor should pop up
- If you hate it, change your
EDITORvariable
- If you hate it, change your
- The traditional first commit message is “Initial commit”
- Now check
git statusagain
git add
git add <file>: Add file to the index- Glossary “Index”: the stored form of the working tree, i.e. the staging area, our “box”
git commit
git commit: Record changes to the repository- Until you run
git commit, the changes made to the staging area (index) remain separate from the working tree and repository
Writing commit messages
- Writing good commit messages is a skill!
- Commit messages serve as documentation for your project
- Finish the sentence: “This commit will…”
Good
- Fix bug in boundary conditions
- Add new routine for calculating potential
Bad
- update code
- I fixed some stuff
Making our first change
- Change the text in your file however you like
- Time for
git status -
Ok, but how to actually see the changes?
$ git diff # All files $ git diff <file>... # Just certain files - Press
qto quit the “pager”
Commit the change
-
It’s a two-step step:
addthencommit$ git add <file> $ git commit
git diff
git diff: Show changes between commits, commit and working tree, etc- Without arguments, or with just files, shows differences between the working tree and the staging area
- Use
git diff --stagedto see the difference between staging area and latest commit (i.e. what’s going into the next commit)
The basics
Updating the staging area
- Make a change and
git addit - Now make another change to the same bit of that file
- Check
git status, what do you see? - Try
git diff, thengit diff --staged, what’s the difference? git addyour second change, and try the twodiffcommands again
# Edit file
$ git add <file>
# Edit file again
$ git status
$ git diff
$ git diff --staged
$ git add <file>
$ git status
$ git diff
$ git diff --staged
Looking back
- Make some more changes and make two or three more commits
-
View the history so far:
$ git log -
View a particular commit in more detail:
$ git show <hash> - Glossary “commit hash”: a 40-digit hexadecimal “hash” that uniquely identifies a commit. Generally only ~7 digits are needed. The largest projects need upto 12
git log
git log: Show commit logs- There are lots of options here!
- Lots of ways to format the log, or search for particular commits
git show
git show: Show various types of objects- Also lots of options for formatting the output, etc.
Undoing unwanted changes
- Delete your file!
- Check
git status– can you see how to get it back (i.e. discard the change)?
Undoing changes to the index
- Make a change to a file and now add but don’t commit
- The usual –
git status– how do you remove something from the staging area?
Undoing things
# Make a change to a file
$ git checkout -- <file>
# Make another change
$ git add <file>
$ git reset HEAD <file>
git checkout
git checkout [options]: Switch branches or restore working tree files- Glossary “checkout”: modify the working tree en masse
-
Remove unwanted changes to a file:
$ git checkout -- <file> - Note: one of the few things in git that can’t be undone!
git reset
git reset: Reset current HEAD to the specified state- Glossary “HEAD”: the current commit that the working tree is based on
resetcan change the working tree and/or staging area, but doesn’t change HEAD, i.e. what commit you’re working from-
Remove a file from the staging area (but leave the changes in the working tree):
$ git reset HEAD <file>
Beyond the basics: branches
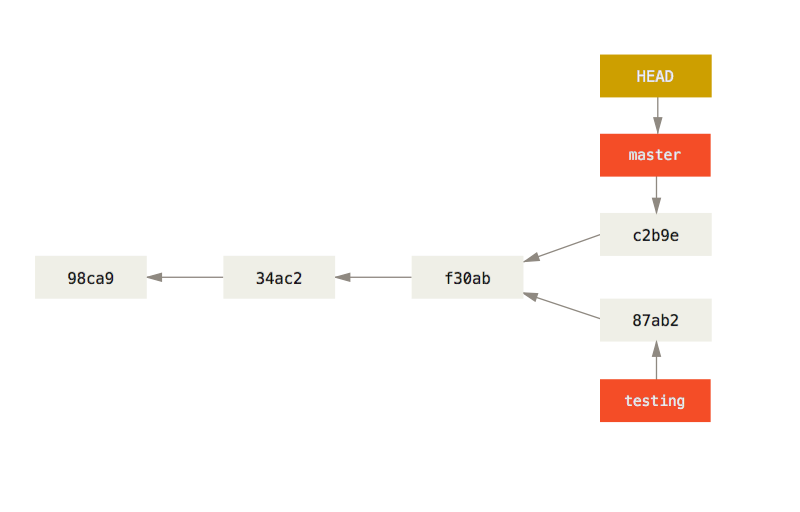
What is a branch?
- A git repo is like a tree (technically a directed acyclic graph), and like trees has branches
- More practically, a branch is just a label for a particular commit
- Can have lots of different labels on a given commit, i.e. lots of branches all the same
- Default first branch is called “master”
- You’re not forced to share your local branches with others
- Can experiment and explore, then chuck away branches that didn’t work out
- Making a new branch is always safe!
Making a new branch
git branchcommand is normally not what we want- Make a new branch and check the
statusandlog:$ git checkout -b new_branch $ git status $ git log
Switching branches
-
Switch back to master, check
statusandlog:$ git checkout master $ git status $ git log
Making changes on a branch
- Switch back to your new branch
- Create a new file, add some text and save it in your repo
- Add and commit this new file
- Let’s look at a summary of all our branches:
$ git log --oneline --all --graph - Can you see where
master,HEADand your new branch are? - Switch back to
master– what’s happened to your new file?
$ git checkout <your branch>
# Add a new file
$ git add <new file>
$ git commit
$ git log --oneline --all --graph
$ git checkout master
$ ls
Moving forward: Merging
Merging
- Branches are only really useful if we can get those changes back into our main branch
- Merges are probably the biggest cause of problems, as it can be a tricky problem!
- Remember: it’s always safe to make a new branch and try something out there!
- Several different ways to do a merge, with differing results
Fast-forwarding
- This works when the branch being merged from was forked from the tip of the branch being merged into
- Often the nicest way to merge if it’s possible
 ^        C <-- branch2
 |        |
 |        B
 |       /
time    A   <-- branch1
^ C <-- branch2 > C <-- branch1, branch2 | | > | | B > B | / > | time A <-- branch1 > A
A simple case
- You should have two branches:
masterand<your branch> - Only difference should be
<your branch>has an extra file in it - Very simple to merge this case!
- Checkout master and
mergeyour branch -
What does the full log look like now?
$ git checkout master
$ git merge <your branch>
$ git log --oneline --all --graph
git merge
git merge: Join two or more development histories together-
From the branch you want to merge something into, run
$ git merge <other branch> -
If you run into trouble, abort the merge, create a new branch from your “main” branch and try things out in there
$ git merge --abort
$ git checkout -b test-merge-branch
Non fast-forwarding
- If there are any “conflicts” between the two branches, it’s a little trickier
- You’ll need to resolve the conflicts, and a special “merge commit”
will be created
- This is special as it has two parents
-
Some people/projects prefer to always have a merge commit as this may be easier to remove a feature if it has multiple commits
 ^      C    <- branch1
 |      | B  <- branch2
 |      |/
time    A
> D <- branch1 (merge commit) > |\ ^ C > C | | | B > | B <- branch2 | |/ > |/ time A > A
Fixing conflicts
- Conflicts happen when both branches touch the same line(s) in a file
- Conflicts are marked with a diff-like syntax
- To resolve the conflict, just go to the conflicting files and edit them appropriately
-
There are lots of tools that can help you with this, e.g. ediff, meld, diff3
<<<<<<< HEAD line changed in branch1 ======= line changed in branch2 >>>>>>> merging branch - Just delete all the special markers and the lines(s) you don’t want to keep
- Sometimes you want some combination of both regions – just edit the lines to keep what you want
- You can bail out of a merge with
git merge --abort
Creating conflicts
- Make a new file call
conflicts.txtwith the contents “some words” - Commit this file to
master - Now create and checkout a new branch called
conflict-branch - Change
conflicts.txtto read “some more words” - Commit this file on
conflict-branch - Checkout
masteragain and changeconflicts.txtto read “some other words” - Commit this file on
master - Now try to merge
conflict-branchintomaster - Fix the conflict, save the file
$ echo "some words" > conflicts.txt
$ git add conflicts.txt; git commit
$ git checkout -b conflict-branch
$ echo "some more words" > conflicts.txt
$ git add conflicts.txt; git commit
$ git checkout master
$ git log --all --oneline --graph
$ echo "some other words" > conflicts.txt
$ git add conflicts.txt; git commit
$ git merge conflict-branch
# Remove conflict markers from conflicts.txt
$ git add conflicts.txt; git commit
$ git log --all --oneline --graph
Rebasing
- DANGER! This rewrites history!
- This has the biggest potential to cause headaches
- Rebasing a branch onto another one means to change the first branch’s “base” to the new branch
- It works by “replaying” the commits on top of the second branch
 ^      C   <- branch1
 |      | B <- branch2
 |      |/
time    A
> B' <- branch2 ^ C > | | | B > C <- branch1 | |/ > | time A > A B'contains (roughly) the same diffs asB
Stashes
- Very often the case that you want to switch branches, but you have made changes that either clash with the other branch, or you just don’t want to carry over
- Stashes are like commits on “anonymous” branches
- They save both your staged and unstaged changes, then discard them from your working tree
- Change your file, then
stashit - View the stashes with
stash list, and re-apply the latest stash withstash apply
$ git stash
$ git stash list
$ git stash apply
Getting started with GitHub
Sign up
- Go to http://github.com
- Sign up for an account
Make a repository on GitHub
- Click the green
Newbutton on the left - Give it a name and decide if you want it public or private
- Make sure
Initialize this repository with a READMEis unchecked- Also that
Add .gitignoreandAdd a licenseare None
- Also that
- Click
Create repository
Add the remote repository
- Follow the instructions on GitHub:
# Add the remote
$ git remote add origin https://github.com/<username>/into_to_git.git
$ git push origin master
git push
git push: Update remote refs along with associated objects- Glossary: “remote”: a version of this repository that is located elsewhere
- Glossary: “refs”: reference to some git object (normally a branch)
- Glossary: “tracking branch”: a local reference to this branch on a remote repo
Getting remote changes
- From the main repository page, click the green
Add a READMEbutton at the bottom - Name the file
README.mdand some text - Click the green
Commit new filebutton at the bottom- Don’t forget a nice commit message!
- Now we need to get this file in our local version…
-
The quick way:
$ git pull
git pull
git pull: Fetch from and integrate with another repository or a local branch- If the branch has a tracking branch (i.e. is linked to some branch
on a remote), then
git pulldoes the Right Thing - Otherwise, specify remote and branch:
git pull <remote> <branch>
Further reading
- Git book: https://git-scm.com/book
- Atlassian tutorial: https://www.atlassian.com/git/tutorials
- Codecademy: https://www.codecademy.com/learn/learn-git