All in One View
Content from Software Packaging Overview
Last updated on 2026-06-08 | Edit this page
Overview
Questions
- What is software packaging?
- How is packaging related to reproducibility and the FAIR4RS principles?
- What content compromises a software package?
Objectives
- Recognise the importance of software packaging to ensure reproducibility.
- Understand what the basic building blocks of a package are in general
Introduction
One of the most challenging aspects of research is reproducibility. This necessitates the need to ensure that both research data and research software adhere to a set of guidelines that better enable open research practices across all disciplines. The recent adaptation of the original FAIR principles (Findable, Accessible, Interoperable, Reusable) means that research software can now also benefit from the same general framework as research data, whilst accounting for their inherent differences, including software versioning, dependency management, writing documentation, and choosing an appropriate license. This is commonly referred to as the FAIR4RS (FAIR for Research Software) principles.
Can you recall a time when you have used someone else’s software but encountered difficulties in reproducing their results? What challenges did you face and how did you overcome them?
Software packaging is one of the core elements of reproducible research software. In general, it encompasses the process of collecting and configuring software components into a format that can be easily deployed on different computing environments.
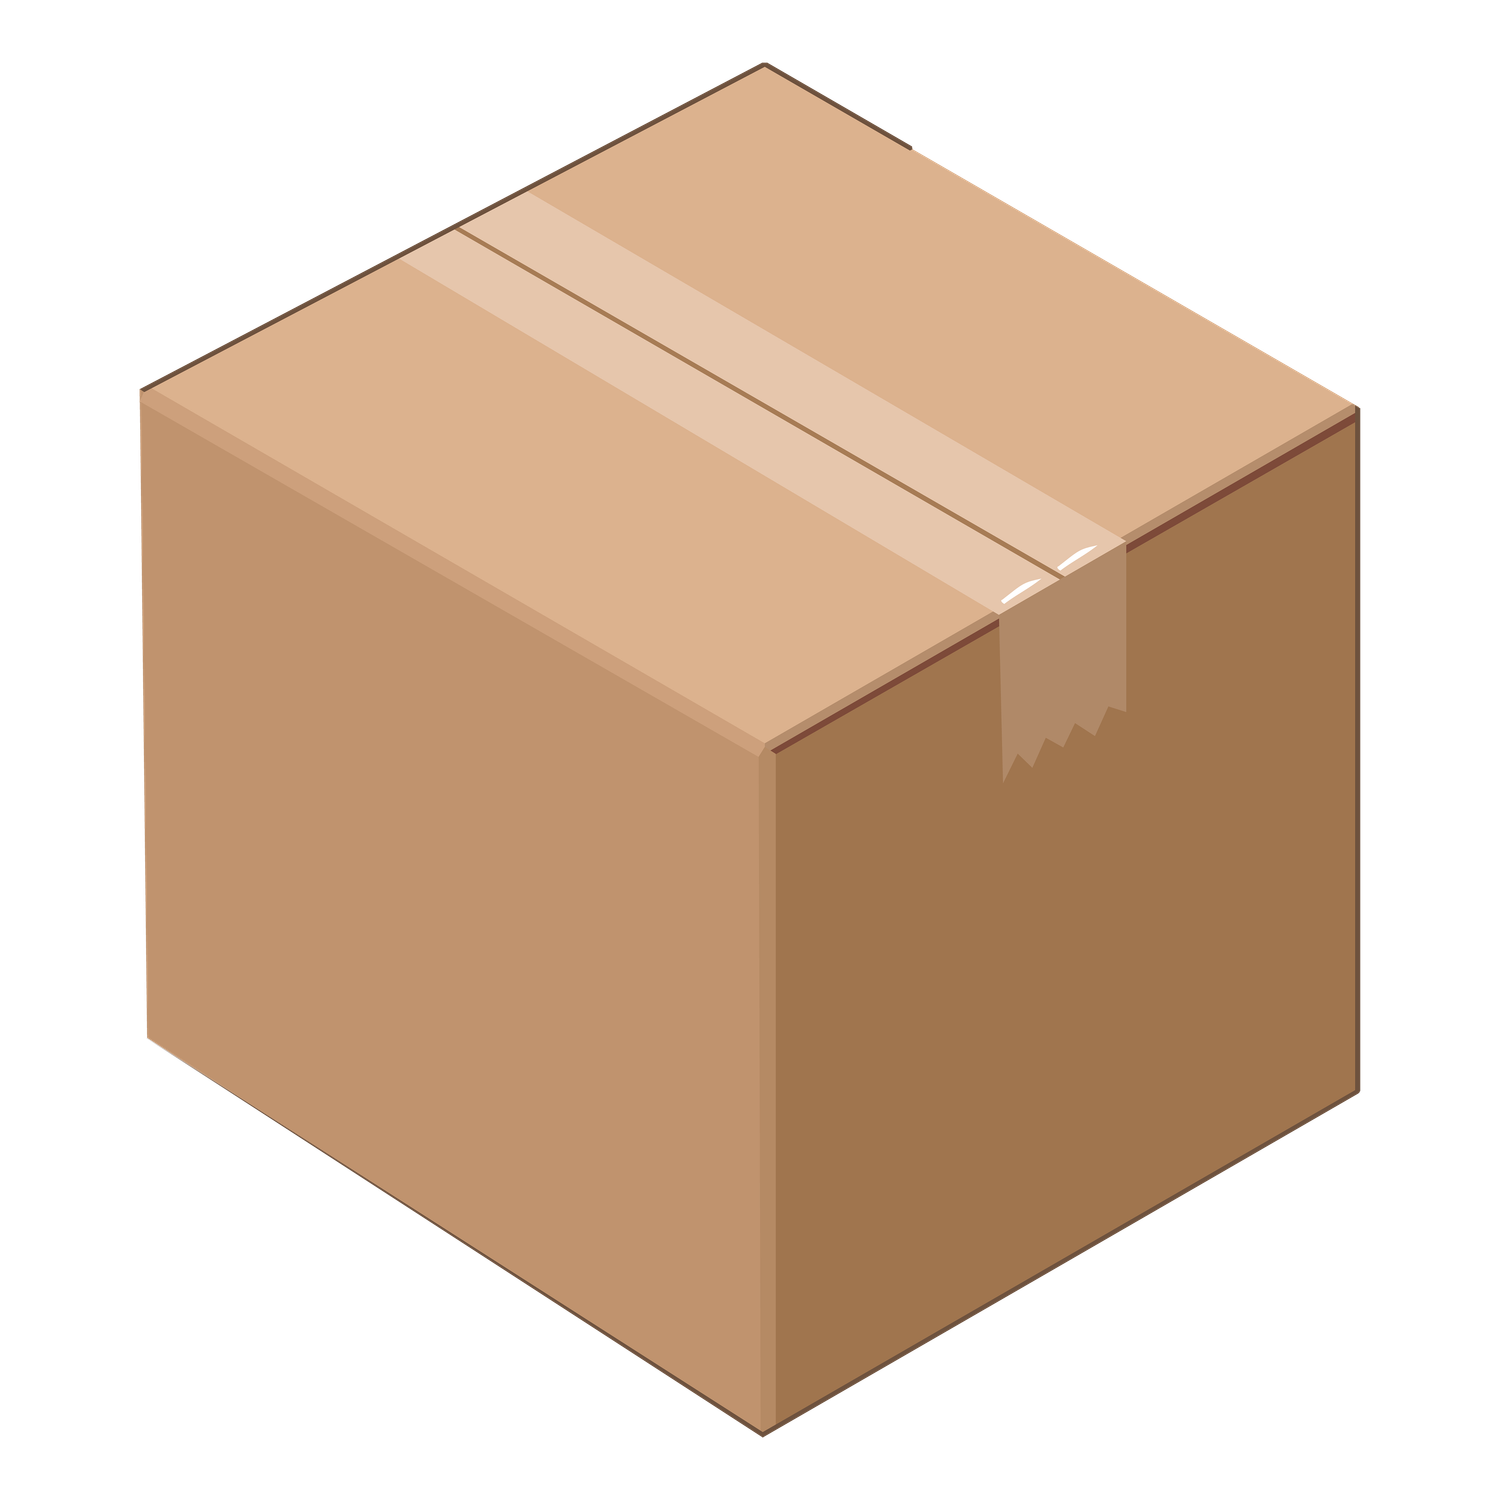
Think about what a package is in general; you typically
have a box of items that you want to post to someone else in the world.
But before you post it for others to use, you need to make sure the
package has things like: an address label, an instruction manual, and
protective material.
Challenge 1: Packaging Analogy
Using the analogy in the callout above, provide an example for each package attribute in terms of the software attribute.
The above callout should help you think about a few different possible analogies.
Box of items: The software itself (source code and additional resources e.g. data, images).
Address label: Computer readable instructions to reproduce an environment with the dependencies setup
Instruction manual: User documentation explaining how to use the software effectively.
Protective materials: Error handling routines to safeguard the software from misuse or unexpected situations, and tests to verify the code functions under a variety of conditions
Why Should You Package Your Software?
As we’ve touched on above, there are several benefits to packaging your software:
Ease of installation: Instead of manually copying individual files and setting configurations, users can automatically install the package using a package manager.
Dependency management: Automates the process of installing the dependencies to prevent version conflicts and ensures the software environment is consistently correct
Accessibility: Storing completed packages on central repositories ensures they are easier to access for other researchers and contributes to the software ecosystem
Standardisation: Packaging enforces a standard structure and format for software, making it easier for users and developers to understand.
Reproducibility: A packaged piece of software is a snapshot of the code and its dependencies at a specific point in time, making it easier to reproduce results
Research impact and collaboration: From a research impact perspective, software packaging ensures reproducibility, accessibility, and ease of dissemination to the wider research community.
If you decide that packaging your software is right for your project, there are some important questions that you, as the developer, should consider before getting started:
Target Users: Who are you building this package for? Beginners, experienced users, or a specific domain? This will influence the licence you choose as well as the level of detail needed in the documentation and the complexity of dependencies you may need to include. (Software lifecycle course materials)
Generalization: Is your code generalized to the extent it can be used by others, or does it rely upon your specific machine’s file paths or local input data? Will it handle data in different formats? (Software Design Course coming soon!)
Dependencies: What other libraries does your package rely on to function? What about hardware dependencies? Have these been documented in a standard format? (Reproducible environments course materials)
Testability: How will users test your package? You should consider including unit tests and examples to demonstrate usage and ensure your code functions as expected. (Testing and CI course materials)
Documentation: Is there a
READMEdetailing installation instructions and basic usage as well as internal documentation in the form of docstrings? (Documentation course materials)Scalability: As your project and software grows in size and complexity, how can you effectively handle the increased modules, dependencies and distribution requirements?
Of course, this is not an exhaustive list, however, once you have thought about candidate solutions for these questions, you’re in a good position to start packaging your software.
Anatomy of a Software Package
The most basic directory structure of a software package looks something like:
📦 my_project/
├── 📂 <source>/
│   └── 📄 <code>
└── 📄 README.md
└── 📄 <metadata>
where
- 📄
README.mdprovides the essential information about your package including how to install and use it - 📄
<metadata>is a configuration file detailing the most important metadata: package name, version, authors, and dependencies amongst others. Python’s metadata file ispyproject.tomlwhile R’s isDESCRIPTION. The following sections will show examples of both of these. - 📂
<source>contains the source code. The structure and naming conventions of this folder will differ between programming languages
Challenge 2: Improving your project’s packaging
The directory structure of a basic package shown above is a good starting point, but it can be improved. From what you have learned so far, what other files and folders could you include in your package to provide better organisation, readability, and compatibility?
Use the emoji folder structure above to get you started.
A possible improvement could be to include the following to your package:
📦 my_project/
├── 📂 <source>/
│   └── 📄 <code>
├── 📂 tests/
│   └── 📄 <tests>
├── 📂 docs/
│   └── 📄 example_usage.md
├── 📂 resources/
│   └── 📄 example_data.csv
└── 📄 LICENSE.md
└── 📄 CODE_OF_CONDUCT.md
└── 📄 README.md
└── 📄 <metadata>
Where:
- 📄
LICENSE.mdexplicitly details licensing terms and conditions under which the package’s code and associated assets are made available to others for use, modification, and distribution. - 📄
docscontains additional long form documentation, either hand-written and/or generated automatically from the docstrings. Often hosted as a separate website. - 📄
resourcescontains any additional resources, such as example data or images - 📄
CODE_OF_CONDUCT.mdoutlines community guidelines for behaviour and standards for contributors
Although we have touched on the core concepts of packaging, we still need to learn about how to write the metadata and logic for building a package in both Python and R. The next episode of this course will show example minimal package structures for both of these languages.
Reproducibility is an integral concept in the FAIR4RS principles. Appropriate software packaging is one way to account for reproducible research software, which involves collecting and configuring software components into a format deployable across different computer systems.
Software packaging is akin to the packaging a box for shipment. Attributes such as the software source code, installation instructions, user documentation, and test scripts all support to ensure reproducibility.
The purpose of a software package is to install source code for execution on various systems, with considerations including target users, dependencies, testability and scalability.
Content from Accessing Packages
Last updated on 2026-06-08 | Edit this page
Overview
Questions
- How can I access my own package?
- What are the different ways of downloading Python packages?
- What are the different ways of installing R packages?
Objectives
- Install packages from source in both R and Python
- Install packages using
pip - Install packages in R
Introduction
Due to the proliferation of software into many areas of academic research, it is quite likely that you won’t be the first person to set off on solving any particular task. Many others have worked on common problems and then shared their solution in the form of a package, which you can conveniently integrate into your own code and use!
Popular Packages
Some of the most popular packages you may have heard of are:
- Numpy (Python)
- Pandas (Python)
- tidyverse (R)
- ggplot2 (R)
Python
To use a package that is installed you use the key word
import in Python.
PYTHON
# This imports the pandas package and gives it a new name 'pd'.
import pandas as pd

# Use the package to read a file
pd.read_csv("my_data.csv")
Python Package Index (PyPI)
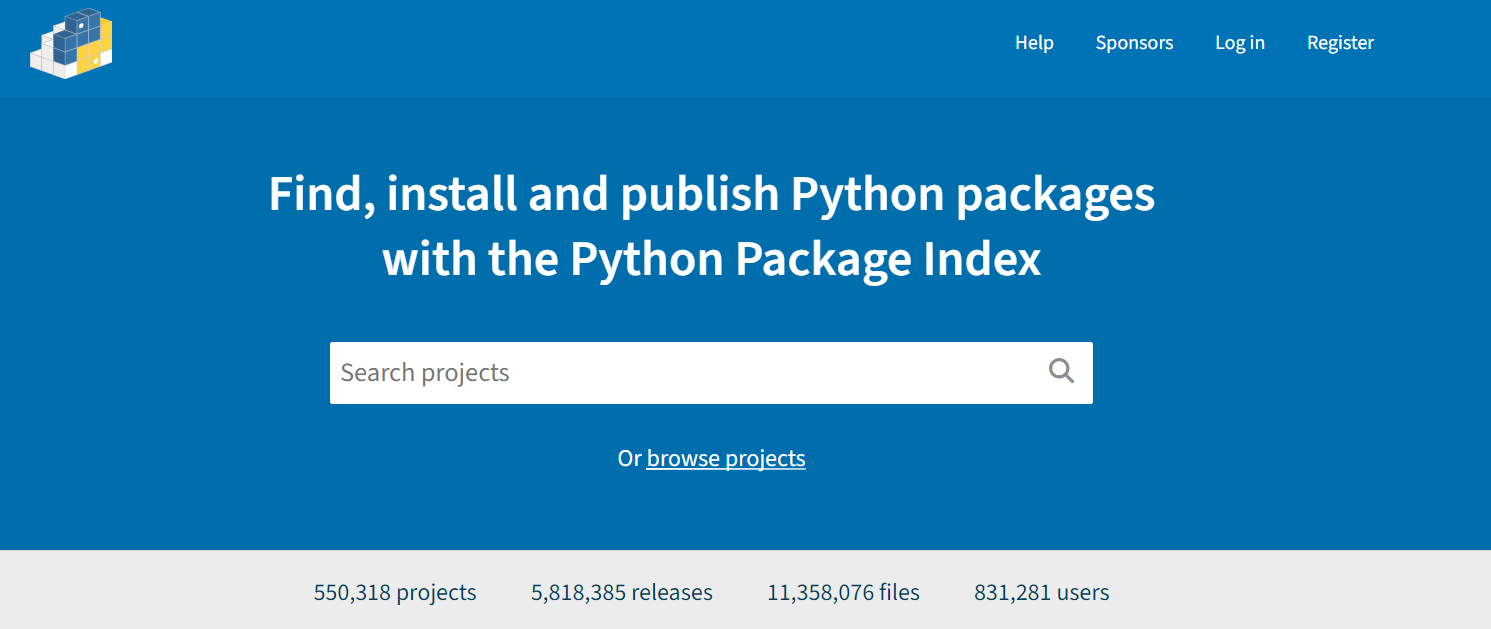
The Python Package Index or PyPI is an online repository of Python packages hosting over 500,000 packages! While there are alternatives such as conda-forge, PyPI is by far the most commonly used and likely to have all you need.
Exercise 1: Explore PyPI
Explore PyPI to get familiar with it, try searching for packages that are relevant to your research domain / role!
pip
pip (package installer for Python) is the standard tool for installing packages from PyPI. You can think of PyPI being the supermarket full of packages and pip being the delivery van bringing it to you.
Using pip
pip itself is a Python package that can be found on PyPI. It however comes pre-installed with most Python installations, for example python.org and inside virtual environments.
The most common way to use pip is from the command line. At the top of a package page on PyPI will be the example line you need to install the package
python -m pip install numpyThe above will install numpy from PyPI, a popular scientific computing package enabling a wide range of mathematical and scientific functions.
You may notice a wheel file download during the pip install, for
example Downloading numpy-2.0.0-cp312-cp312-win_amd64.whl.
A wheel in Python is a pre-built package format that allows for quicker
and more efficient installation, so when it is downloaded your local
computer doesn’t need to do any building. The alternative is source
files which often take the form .zip or
.tar.gz, which when downloaded will then need to be built
then installed, which is often far slower.
Exercise 2: Create venv and install Numpy
Step 1: Create a venv in the .venv directory using the command
python -m venv .venv and activate it with
When activated you should see the name of your environment in brackets at the start of your terminal line
Step 2: Install Numpy into your new environment
Step 3: Check your results with python -m pip list
Step 4: Deactivate your environment with deactivate
Check out this documentation or the FAIR4RS course on virtual environments to learn more!
Installing from source
pip can also be used to install packages from source. This means that
the package file structure (source) is on your local computer and pip
installs it using the instructions from the setup.py or
pyproject.toml file. This is especially handy for packages
either not on PyPI, like ones downloaded from github, or for your own
packages you’re developing.
Here the . means to install your current directory as a
Python package. For this to work the directory your command line
interface is currently in needs to have a packaging file,
i.e. setup.py or pyproject.toml.
R
To load a package in R the library function is used,
which will automatically make all the exported functions from that
package available in the R environment. Contrast this behaviour with
Python where you still need to write pd.read_csv rather
than read_csv.
R
# Loads the readr package and places all its exported functions into the global namespace
library(readr)

# Use the package to read a file
read_csv("my_data.csv")
Less commonly you can access a single function from a package using
the :: syntax, this is useful for situations where you
might not want to populate your environment with all the exported
functions from that library, e.g. if you know there will be a
conflict.
R
readr::read_csv("my_data.csv")
The Comprehensive R Archive Network (CRAN)
R’s primary package repository is called CRAN. It currently (at the time of writing) hosts 23,667 packages, significantly fewer than PyPI, but there are several substantial differences between these two repositories. PyPI functions as more of a warehouse with a very low barrier to entry, hence the vast number of packages. CRAN by contrast operates as a curated library with very strict criteria for incoming packages (as well as for any updates!). This stark difference in philosophy results in a very different user experience.
Exercise 3: Explore CRAN
Explore CRAN to get familiar with it, try searching for packages that are relevant to your research domain / role! The task views are particularly useful for scoping out the range of existing packages in your field. Look at the page for a package (e.g. deSolve) and identify the different types of documentation available.
install.packages
R does not have a separate package manager like pip that
can be run as an external tool. The primary way of installing packages
is through the install.packages command which is run from
within R. This function by default installs from CRAN, although it can
be used to install from other repositories setup in the same fashion as
CRAN. The example below shows how to use it to install packages (NB: it
will ask for a mirror if one isn’t setup, the 0-Cloud
option is recommended).
R
install.packages(c("dplyr", "ggplot2"))
Binary vs source packages in R
Like with Python, packages will be downloaded as pre-built binaries
but only for Windows (.zip) and Mac (.tgz)
users - on Linux machines the source package (.tar.gz) will
be downloaded and built directly on the user’s machine. This is because
CRAN does not offer pre-built Linux packages owing to the vast
heterogeneity in Linux toolchains. Python accomplishes this via the
Manylinux standard.
Other package sources
Because the barrier to publishing a package on CRAN is so high, there exist several alternatives that have built up popularity in different fields.
GitHub
A far more streamlined alternative to hosting your package on CRAN is to maintain it on GitHub where users can install it from. This fits in neatly into a version-controlled workflow (see our course on version control) and for many use cases will be sufficient.
To install a package from GitHub the pak package is
required which can install from GitHub using the
pkg_install function. This example will install the current
development version of dplyr straight from GitHub, which
will be newer than the stable release on CRAN.
R
pak::pkg_install("tidyverse/dplyr")
devtools vs remotes
vs pak
You might come across documentation recommending to use
devtools or remotes to install GitHub-hosted
packages instead of pak.
devtools::install_github was once the recommended method,
then this functionality was spun-out into the more minimal
remotes package to keep devtools more
streamlined on package development. Now as of the time of writing
pak is the current one-stop-shop for package management in
R and is faster and more robust than
devtools/remotes and can handle more backends
than install.packages.
Bioconductor
Before GitHub became so widespread as a package repository, the
Bioinformatics community created their own alternative to CRAN: Bioconductor. This is accessed
via the R package BiocManager or via pak again
by using the syntax
pak::pkg_install("bioc::<package>").
Local
pak can also be used to install local packages from
source by passing the pkg_install function a path to a
package stored on the local filesystem.
R
pak::pkg_install("path/to/source")
-
pipis the most common tool used to download and access Python packages from PyPI. - PyPI is an online package repository which users can choose to upload their packages to for others to use.
- CRAN is R’s repository which has a far higher barrier to entry than PyPI.
-
install.packagesis the gold standard way of installing packages from CRAN. -
pakis the modern fast package manager in R and can install from a variety of sources. - Both
pipandpakcan also be used to install packages on your local system (installing from source).
Content from Creating Python Packages
Last updated on 2026-06-08 | Edit this page
Overview
Questions
- Where do I start if I want to make a Python package?
- What will I need / want in my package?
- What’s considered good practice with packaging?
Objectives
- Create and build a basic example Python package
- Understand all the parts and decisions in making the package
Introduction
This episode will see us creating our own Python project from scratch and installing it ready for use. Feel free if you’re feeling adventurous to create your own package content or follow along with this example of a Fibonacci counter.
Python Package Structure
The barebones directory structure of a Python package is as follows:
📦 my-package/
├── 📂 src/
│   └── 📂 my_package/
│       └── 📄 my_code.py
│       └── 📄 __init__.py
└── 📄 pyproject.toml
where
- 📦
my-package/is the root directory of the project. - 📂
my_package/is the package directory containing the source code. - 📄
pyproject.tomlis a configuration file for setting up the package, containing basic metadata.
Tools such as uv and pip use the
pyproject.toml file to configure how the package is built,
distributed, and installed.
NB: the difference in punctuation between
my-package and my_package
The top level folder name is the project name as it would be listed
on PyPI and cannot contain underscores (but hyphens are valid), while
src/my_package is the name of an importable package in
Python and cannot contain hyphens (but underscores are valid). This
oddity is sometimes observed in the wild; for example the SciKit Learn
package is installed with pip install scikit-learn but the
actual imports are to import sklearn.
A simple solution to the awkwardness of having two subtly different names is to only use alphanumeric characters and is the common approach in Python.
At this point, it’s worth discussing the use of the
__init__.py file. The __init__.py script is
used to mark a directory as a Python package, allowing the contained
modules to be imported (note; the use of double underscores in Python,
often abbreviated to dunder lines, signal that this script
should be “hidden” from users, helping distinguish this script from
others). It also contains any initialisation code for the package.
For instance, consider the times you have imported a package, such as
numpy. The ability to write
import numpy is enabled by the modular structuring of the
numpy package, including the __init__.py file. The complete
import numpy statement then means Python searches for the
numpy package in its search path (sys.path)
and loads its contents into the namespace under the name
numpy. Packages that follow the folder structure above are
often referred to as regular packages.
However, in Python versions >= 3.3, the concept of
implicit namespace packages (see PEP 420) was introduced.
Namespace packages are commonly used to split a regular Python package
(as described above) across multiple directories, which ultimately means
the __init__.py file is technically not required to create
any Python package. For the purposes of this course, we will use an
__init__.py to keep with convention and avoid complications
with namespace packages.
What other files and content go into a package?
Think back to the earlier episodes and try to recall all the things that can go into a package.
- Other metadata files - e.g. LICENCE, README.md, citation.cff
-
tests- A directory full of test (unit, integration, etc…) - Extended documentation
- Example data or other resources
In this episode we will only be creating a minimal example so many of the files you have thought of won’t be included. Next we will be creating our directory structure.
In either your documents folder if you are on Windows or
your home directory if you are on macOS or Linux, create a
folder called fibonnaci-uoy-<name> where
<name> is either your University username or a random
string if you don’t want your username to be displayed publicly on the
web (when we publish our packages to Test PyPi at the end of the
session). In the reminder of this episode the placeholder
abc123 will be used to represent your username/random
string. Populate the newly created directory with the following
sub-folders and empty files.
📦 fibonacci-uoy-abc123/
├── 📂 src/
│   └── 📂 fibonacci_uoy_abc123/
│       └── 📄 sequence.py
│       └── 📄 __init__.py
├── 📄 pyproject.toml
└── 📄 README.mdThe Reproducible
Computational Environments introduced the uv package and project manager.
One of its many features is the ability to create a package skeleton
with the command below, which will create a directory called
fibonacci-uoy-abc123 in the current working directory. In
addition to creating the required file structure, it will also populate
the pyproject.toml with basic metadata.
uv init --package fibonacci-uoy-abc123Configuration File
The first thing we will do in this project is look at the metadata,
stored in pyproject.toml. .toml files have
sections (termed ‘tables’) denoted by [<title>]
lines. In a pyproject.toml file there are 2 tables required
at minimum: [build-system] and [project]. Take
a look at the minimum example pyproject.toml below (this is
what is populated by uv, along with a
project.scripts table not shown here).
TOML
[project]
name = "fibonacci-uoy-abc123"
version = "0.1.0"
description = "Add your description here"
readme = "README.md"
authors = [
    { name = "YOUR NAME", email = "YOUR_EMAIL@DOMAIN }
]
dependencies = []

[build-system]
requires = ["TODO"]
build-backend = "TODO"
[project]
The [project] table is where your package’s core
metadata is declared. If you used uv to create your
skeleton then the author information may have been automatically
populated from your git settings. Any dependencies used by
your package must be declared in the dependencies list, for
example numpy or pandas.
[build-system]
The [build-system] table specifies information required
to build your project directory into a package, both the name of the
build tool (requires) and the command it needs to run
(build-backend). There are multiple popular build
tools that can be used to build your project, in this tutorial we
will use uv, as it is simple and very popular and fits in
neatly to a uv managed project.
pyproject.toml documentation
The full list of accepted keys can be found here in the documentation
Create your configuration file
Populate your pyproject.toml file with the two required
tables
TOML
[project]
name = "fibonacci-uoy-abc123"
version = "0.1.0"
description = "A package which can produce the Fibonacci sequence"
readme = "README.md"
authors = [
    { name = "Your Name", email = "youremail@email.com" }
]
dependencies = []

[build-system]
requires = ["uv_build"]
build-backend = "uv_build"Building a Python package means converting the raw source code into a
wheel (.whl) that is ready to be installed. If any
extensions are present (such as C++) they will be compiled as well and
bundled into the wheel. However, even for pure Python packages there are
still several differences between the raw source code and the wheel:
namely that the wheel is stripped of all metadata beyond that needed to
install the package and that the code is reorganized into a standardized
folder structure that can be placed directly into a user’s library.
If you used uv to create the package skeleton you might
have noticed the [project.scripts] table in
pyproject.toml as follows. This section is used to create
new entry-points into your package so that certain functions can be run
from the command line easily. The example below means that running
fibonacci-uoy-abc123 on the command line will run the
main function from this package, rather than having to type
python -c "import fibonacci_uoy_abc123; fibonacci_uoy_abc123.main()".
This is particularly useful when your package provides a tool for others
to use, instead of (or in addition to) library functions to be
imported.
Creating Python modules
The next step in this episode is to finally write some Python code!
.py files are termed ‘modules’ in the context of a package
and they are stored in src/<package>.
This example package will allow a user to find any value from the
Fibonacci sequence. The Fibonacci sequence is a series of whole numbers
where each number is the sum of the two previous numbers. The first 8
numbers of the sequence are 0, 1, 1, 2, 3, 5, 8, 13.
A Python implementation of an algorithm to return the Fibonacci
sequence for a specified number of terms is shown below. Add this into
the sequence.py module that you created earlier.
PYTHON
def compute(n_terms):
  current_num = 0
  next_num = 1

  for i in range(n_terms):
    print(current_num)
    prev_num = current_num
    current_num = next_num
next_num = prev_num + current_numReinventing the wheel
It is good to ask yourself if the package or features you are designing have been done before. Obviously we have chosen a simple function as the focus of this episode is on packaging code rather than developing novel code.
Using your Python module
Create a script in your project directory that imports and uses your sequence script. This will serve as a good quick test that it works.
If you try running python use_fibonacci.py at first it
will fail with
ModuleNotFoundError: No module named 'fibonacci_uoy_abc123'
- this is because it isn’t installed! Running
python -m pip install . from the same working directory as
the pyproject.toml will install your package, thereby
fixing this error. Alternatively, if you’re using uv you
can simply run uv run python use_fibonacci.py, which will
automatically install the current working version of the package into a
virtual environment before running the script.
Editable Install
When installing your own package locally with pip, there
is an option called editable or -e for short.
python -m pip install -e .
With a default installation (without -e), any changes to
your source package will only appear in your Python environment when
your package is rebuilt and reinstalled. The editable option allows for
quick development of a package by removing that need to be reinstalled,
for this reason it is sometimes called development mode!
Adding dependencies
So far our package is entirely self-contained and doesn’t require any other libraries. However, this isn’t a very realistic scenario as very few packages are written entirely from scratch without building on other libraries.
We’ll now look at an example of how dependencies are added during the
package development process. To do so, we’ll extend the iterative
Fibonacci generation function by using Binet’s
Formula to vectorize the process. Vectorization means mathematical
operations are performed on an entire list of numbers at once in a
single step (by delegating to fast numerical libraries written in C/C++)
rather than looping through each iteration. As well as being faster than
iterative approaches, vectorization methods also scale well with the
number of iterations. Python doesn’t support vectorized functions on its
in-built list data structure, so instead we’ll use numpy
and its array datatype, which does support vectorized operations.
The Python function below will calculate Fibonacci’s sequence using Binet’s formula.
PYTHON
import numpy as np

def compute_numpy(n_terms):
    # Create an array of indices from 0 to n_terms-1
    n = np.arange(n_terms)

    # Define the Golden Ratio components
    phi = (1 + np.sqrt(5)) / 2
    psi = (1 - np.sqrt(5)) / 2

    # Apply Binet's Formula across the entire array at once
    # F(n) = (phi^n - psi^n) / sqrt(5)
    fib_sequence = (phi**n - psi**n) / np.sqrt(5)

    # Round to the nearest integer and convert to int
    fib_sequence = np.rint(fib_sequence).astype(np.int32)

    # Print the results
    for x in fib_sequence:
print(x)Add the vectorized function to the package
Try adding the compute_numpy function to the package and
ensure that you can run it. Think about what additions to the modules
you’ll need to make, as well as the package metadata.
If you’re using uv to manage your package you can simply
run uv add numpy which will add numpy to
dependencies in pyproject.toml and then
install it into the project’s virtual environment. Subsequent
uv run python use_fibonacci.py calls will correctly import
numpy.
What Python packaging file formats and tools exist?
While reading about Python packaging, you will likely stumble across a massive alphabet soup of tools, file formats, and historical terms:
- Ancient History:
distutils,setup.py,eggs - The Transition Era:
setuptools,requirements.txt,setup.cfg - Modern Standards: wheels,
pyproject.toml, Poetry,uv
Fortunately, the Python community has largely settled on
pyproject.toml as the modern, unified standard. You don’t
need to master all of these historical tools to build a package today.
However, understanding how we got here will make the current ecosystem
make a lot more sense!
distutils, setup.py, and setuptools
The first standard tool for installing packages was
distutils (short for distribution utilities), which debuted
in the late 1990s. It relied on a setup.py script to
configure and install packages.
However, storing a package’s configuration inside an executable Python file presented some serious problems:
- Security Risks: Because
setup.pyis actual Python code, runningpip installmeant executing arbitrary code on your machine. A malicious package could easily hide malware inside its setup script. - Boilerplate & Clutter: Every package required writing repetitive, messy code just to define basic things like the package name and version.
- The “Chicken-and-Egg” Problem: To read a
setup.pyfile, you need to run Python. But if that setup.py file required a specific helper library to run, you couldn’t install the helper library without running the file first.
Because distutils was very basic and slow to evolve, a
third-party project called setuptools was created to
supersede it. setuptools added massive improvements, such
as the ability to automatically find packages inside your code, declare
dependencies, and introduced the first true Python package format:
Eggs.
eggs and wheels
Before you can upload your code to the Python Package Index (PyPI)
for others to use, it needs to be bundled into a single file. Eggs
(.egg) were introduced by setuptools as
Python’s first standard package format. While a massive leap forward at
the time, they had severe limitations:
- No Standardized Metadata: Eggs didn’t have a universally agreed-upon internal structure, making it hard for other tools to interact with them.
- Installation Quirks: They were often treated as zipped files added directly to your Python path, which caused bizarre import bugs and made uninstalling them incredibly messy.
- Platform Issues: They didn’t handle compiled code (like C extensions) cleanly across different operating systems.
To fix this, the community created the Wheel (.whl)
format in 2012. Wheels completely superseded Eggs. A Wheel is
essentially a highly standardized, pre-compiled ZIP file. Because all
the heavy lifting is done before you download it, pip can
install a Wheel almost instantly by simply unzipping it directly into
your environment.
requirements.txt
A requirements.txt is a text file where each line
represents a package or library that your project depends on. A package
managing tool like pip can use this file to install all the
necessary dependencies.
requests==2.26.0
numpy>=1.21.0
matplotlib<4.0
While requirements.txt is incredibly common, it is not a packaging
tool. requirements.txt is meant for
deployments (e.g., telling other researchers exactly
what specific versions of packages to download so the application runs
identically on their machine). Packaging tools (like
pyproject.toml) are meant for distribution
(e.g., telling the world what abstract dependencies your library needs
so it can be safely installed alongside other software).
Third-party tools
Over the years, a plethora of third-party tools emerged to plug the gaps left by Python’s built-in utilities. Managing a project required juggling separate tools for dependency resolution, virtual environments, and publishing.
- pyvenv & virtualenv: Early tools dedicated entirely to creating
isolated environments so different projects wouldn’t break each other’s
dependencies. (
pyvenvwas later deprecated in favor of Python’s built-invenvmodule). - Poetry: One of the most successful all-in-one modern tools. Poetry
revolutionized Python by combining dependency management, environment
isolation, and package building into a single tool using a
pyproject.tomlfile.
Today, while Poetry remains highly popular, the ecosystem is shifting
toward ultra-fast, next-generation tools like uv, which
handles environments, syncing, and building at lightning speeds while
strictly respecting modern packaging standards.
Pyproject.toml
Introduced in PEP517,
the latest file for packaging a python project is the
pyproject.toml file. Like a .cfg file, a
toml file is designed to be easy to read and declarative.
It is the current recommended way to package your Python
TOML stands for Tom’s Obvious Minimal Language!
When originally introduced, pyproject.toml was only
designed to solve the “chicken-and-egg” problem by declaring exactly
which build system pip should download to build your
package. A bare minimum pyproject.toml looked like
this.
TOML
[build-system]
# Minimum requirements for the build system to execute.
requires = ["setuptools", "wheel"]
At first, your project’s actual metadata (like its name, version, and author) still had to live in a secondary file like setup.cfg or setup.py.
With the introduction of PEP621 in 2020, project
metadata could also be stored in the pyproject.toml files,
meaning you only now need the single file to specify all the build
requirements and metadata required for your package! This is still the
preferred way in the community.
By moving to pyproject.toml, Python packaging has
finally aligned with other modern languages (like Rust’s
Cargo.toml or Node’s package.json), giving
beginners a safe, clean, and unified way to manage their code.
- A package can be built with as little as 3 files: a metadata file, a
Python script, and an
__init__.pyfile - pyproject.toml files have 2 key tables, [build-system] and [project]
- Editable installs allow for quick and easy package development
- There are multiple standards out there for Python packaging, but pyproject.toml is the current recommended way.
-
uvstreamlines the package development process over using inbuilt Python tooling
Content from Creating R Packages
Last updated on 2026-06-08 | Edit this page
Overview
Questions
- Where do I start if I want to make an R package?
- What will I need / want in my package?
- What’s considered good practice with packaging?
Objectives
- Create and build a basic example R package
- Understand all the parts and decisions in making the package
Introduction
This episode will see us creating our own R package from scratch. Feel free if you’re feeling adventurous to create your own package content or follow along with this example of a Fibonacci counter.
We will be using a couple of R packages to assist with boiler-plate code generation so ensure that these are installed:
devtoolsusethis
R Package Structure
The most basic directory structure of an R package is as follows:
📦 myproject/
├── 📂 R/
│   └── 📄 my_code.R
├── 📄 DESCRIPTION
└── 📄 NAMESPACE
where
- 📦
myproject/is the root directory of the package. - 📂
R/contains the source code (.Rfiles). - 📄
DESCRIPTIONcontains basic metadata describing the package - 📄
NAMESPACEis an automatically generated file that details imports (functions from other packages used in your package) and exports (functions your package makes available to other users). It should never be manually edited.
What other files and content go into a package?
Think back to the earlier episodes and try to recall all the things that can go into a package.
- Other metadata files - e.g. LICENCE, README.md, citation.cff
-
tests- A directory full of test (unit, integration, etc…) - Documentation, both docstrings and long-form (termed ‘vignettees’ in R)
- Example data or other resources
Package names must contain just letters, numbers and ‘.’ - hyphens
and underscores are not permitted. Choosing a name that succinctly
describes your package in a catchy way is quite a challenge! In this
episode we’ll be making a package to generate Fibonacci sequences, so
we’ll use the package name fibonacci.
To create this package skeleton we’ll use the usethis
package, which in addition to creating the folder structure will also
populate the DESCRIPTION with some basic metadata. To do
this, run the command below from within RStudio:
This will do several things:
- Creates directory
fibonacciat location/path/to, so be sure to set the path to somewhere sensible such as your Documents or Home folder - Creates folder for R scripts
- Creates DESCRIPTION and populates it
- Creates an R project
- Opens the project in a new RStudio window
usethis::create_package('/path/to/fibonacci')Once you are working in the new project take a look at the Files tab to see what has been created:
📦 fibonacci/
├── 📂 R/
│   └── 📄 my_code.R
├── 📄 .gitignore
├── 📄 .Rbuildignore
├── 📄 fibonacci.Rproj
├── 📄 DESCRIPTION
└── 📄 NAMESPACE
The additional files beyond the bare minimum detailed before are:
- 📄
fibonacci.Rprojdefines the folder as an R package, used by RStudio to set working directories and allow for easier switching between projects - 📄
.gitignoreremoves the.Rproj.userfile from git (NB: a git repository hasn’t been initialised) - 📄
.Rbuildignoreremoves the.Rprojand.Rproj.userfiles from the R package build process (more details later)
usethis does nothing that you cannot do by hand - it
simply creates folders and files in the right place. It’s particularly
useful for generating skeleton package directories which can be tedious
otherwise, and ensuring that everything is laid out correctly.
While it’s a very useful tool it’s still important to understand what
it is doing - fortunately usethis is very verbose and
explains every step it has taken.
DESCRIPTION
We’ll next turn our attention to the DESCRIPTION
metadata file. This should look like the output below. It contains
fields for basic information such as the name, a description, version
number (more on versioning in a later episode), a longer description,
and a licence. You don’t need to worry about the last three fields -
they are related to how the documentation is generated and the defaults
will suffice.
Package: fibonacci
Title: What the Package Does (One Line, Title Case)
Version: 0.0.0.9000
Authors@R:
    person("First", "Last", , "first.last@example.com", role = c("aut", "cre"))
Description: What the package does (one paragraph).
License: `use_mit_license()`, `use_gpl3_license()` or friends to pick a
    license
Encoding: UTF-8
Roxygen: list(markdown = TRUE)
RoxygenNote: 8.0.0There are a large number of different software licences, differentiated by how you want others to be able to use and extend your code.
The most permissive licence is the MIT licence and is a sensible default if you don’t want to place any restrictions on the use of your software. choosealicense.com can help identify a more suitable licence if you don’t want it fully permissive.
Once you have chosen a licence, you can add it to the package with
one of the usethis helpers;
e.g. usethis::use_mit_license()
NB: in British English the more common spelling is ‘licence’ with a second ‘c’, but in US English it is spelled ‘license’ and is the more common spelling found in documentation.
Populate DESCRIPTION
Enter appropriate values for the Title, Description, and Author.
Adding code
The example application for this episode is the same as in the Python episode: generating values from a Fibonacci sequence of a specified length. An R implementation of the iterative function is shown below.
R
compute <- function(n_terms) {
    current_num <- 0
    next_num <- 1

    for (i in seq(n_terms)) {
        print(current_num)
        prev_num <- current_num
        current_num <- next_num
        next_num <- prev_num + current_num
    }
}
To add this this to the project we can either manually save it into a
file in the R/ directory or run
usethis::use_r("sequence") which will create the file
R/sequence.R and open it in RStudio, saving you a few
clicks.
To load the latest development version of the package into the
environment we run devtools::load_all(). This doesn’t
install the package into your main R installation - instead it just
makes the functions available in your current session. It needs to be
run each time a file in R/ is modified.
Then can run from REPL with just compute(5) and verify
works as expected
Confirm that the code runs
Ensure that the compute function can be run and gives
the expected output.
Documenting functions
As discussed in a previous
lesson, docstrings are a way of providing a summary of a function to
users. They detail the purpose of the function, describe every parameter
and the return value, show example usage, and provide any other
information that will help users. In R the docstrings can be viewed
using the ? operator, e.g. ?lm will show the
documentation page for the lm standard library
function.
In this section we will annotate our Fibonacci function to generate a
similar help page. To do so, in RStudio ensure that
sequence.R is open in the editor and place the cursor in
the compute function. Then select Code -> Insert Roxygen
Skeleton from the top bar. This will insert formatted comments above the
function’s code.
Validating the package
Running devtools::check() provides a way of ensuring
that our package is correctly formatted and adheres to the standards to
be uploaded onto CRAN. Try
running it now and see if your package passes the tests. You should have
at least 1 warning resulting from the unpopulated docstrings. Try to get
to 0 errors, 0 warnings, and 0 notes.
NB: you can safely can ignore warnings about
unable to verify current time, these are resulting from the
check getting the current time from an website that occasionally isn’t
reachable.
You might need to add a licence if you haven’t already with
usethis::use_mit_licence() or similar.
Here is an example of the populated docstrings, which can be viewed
in the Help pane with ?compute.
R
#' Generates values from the Fibonacci sequence.
#'
#' @param n_terms The number of terms to generate.
#'
#' @returns Doesn't return anything but prints the values instead.
#' @export
#'
#' @examples
#' compute(5)
Adding dependencies
Most packages depend on other R packages rather than being entirely self-contained. This section will demonstrate how to bring in existing R packages and use their functions.
In the Python example we used numpy to turn the
iterative sequence generation into a vectorized version. However, most
mathematical operators and functions in base R support vectorized
functionality so there is no need to use an external package. Instead,
we’ll bring in the dplyr library to incorporate a
tidyverse-style approach.
The function below shows the same implementation of Binet’s
Formula but this time within the framework of a
tidyverse workflow using a tibble rather than
a base R data.frame and the mutate function to
add new columns.
The way in which we’d normally access the tibble and
mutate functions in a data analysis script is to run
library(dplyr), but library calls are not used
in package code as they modify the user’s environment. Instead, we must
explicitly specify the package source using the ::
notation, i.e. dplyr::mutate.
R
compute_vectorized <- function(n_terms) {
    # Create an array of indices from 0 to n_terms-1
    df <- dplyr::tibble(
        n = seq(0, n_terms-1)
    )

    # Define the Golden Ratio components
    phi <- (1 + sqrt(5)) / 2
    psi <- (1 - sqrt(5)) / 2

    # Apply Binet's Formula across the entire array at once
    # F(n) = (phi^n - psi^n) / sqrt(5)
    df <- df |>
        dplyr::mutate(
            sequence_raw = (phi**n - psi**n) / sqrt(5),
            sequence_int = as.integer(sequence_raw)
        )
    df
}
But devtools::check() should show a warning - despite
the source code stating that these functions are imported from
dplyr, the package itself needs to declare
dplyr as a dependency.
R
❯ checking dependencies in R code ... WARNING
  '::' or ':::' import not declared from: ‘dplyr’

❯ checking R code for possible problems ... NOTE
  compute_vectorized: no visible binding for global variable ‘n’
  compute_vectorized: no visible binding for global variable
    ‘sequence_raw’
  Undefined global functions or variables:
n sequence_rawAdd dplyr as a dependency
The DESCRIPTION file needs to be updated to declare
dplyr as a package. Unlike Python’s
pyproject.toml, which uv initiates with an
empty dependency list, there is no obvious placeholder for where to do
this.
Either refer to the R
packaging documentation, or have a look at the available
usethis functions as one of them will come in handy here
(type usethis:: then press TAB in the R console to view all
the functions in a package.)
An Imports section needs to be added to
DESCRIPTION as follows. This can either be modified by hand
or automatically using usethis::use_package("dplyr").
Imports:
dplyrThe tidyverse functions heavily rely on so-called
Non-Standard Evaluation. This means referring to columns directly
without quotation marks or explicitly referencing it as a column.
Compare these 3 ways to make a column called ‘foo’. The first 2 use
standard evaluation - the R interpreter knows that foo is
either a column because it is directly referenced as such using the
$ syntax, or it is written as a string. However, in the
third example the R interpreter just sees foo = 1:10 and
thinks that foo is a global variable that hasn’t been
declared before, hence the note.
R
df$foo <- 1:10
df['foo'] <- 1:10
df |> mutate(foo = 1:10)
In practice, these notes can be safely ignored if you do not intend for your package to be uploaded to CRAN. However, if you do intend to store it in CRAN then the check must be completely clean. The simplest solution is to simply not use non-standard evaluation. Non-standard evaluation makes interactive data analysis code cleaner, but it does not offer much benefit for library code which is not written very frequently.
The compute_vectorized function should now be able to be
loaded and run from the R console! Verify that the results are the same
as compute and make any suitable modifications - including
adding docstrings.
There are 3 types of dependencies in R packages.
- Imports: Must be installed for your package to work. This is what
usethis::use_package()defaults to and is generally the right choice - Suggests: Not required for the core package functionality but might be needed for development, i.e. running tests or building vignettes
- Depends: Used to pin to a specific R version and packages. But it also loads all packages into the namespace so do not use unless absolutely necessary
- A package can be built with as little as 3 files:
DESCRIPTION,NAMESPACE, and a source file. -
usethishelps generate package skeletons, add dependencies, and add source code files -
devtools::load_all()loads the current package allowing for quick testing without needing to install it -
devtools::check()validates the package structure and contents
Content from Versioning
Last updated on 2026-06-08 | Edit this page
Overview
Questions
- Why is versioning essential in software development? What problems can arise if versioning is not properly managed?
- How can automation tools, such as those for version bumping, improve the software development process?
- Why is it important to maintain consistency and transparency in software releases?
Objectives
- Explain why versioning is crucial for software development, particularly in maintaining reproducibility and ensuring consistent behaviour of the code after changes.
Introduction
In previous episodes, we developed a basic Python/R package to demonstrate the importance of software reproducibility. However, a crucial question that we haven’t addressed yet is: how can we, as the developers, ensure that a change in our package’s source code does not result in the code failing or behaving incorrectly? This is also an important consideration for when you are releasing your package.
One of the pitfalls of packaging is to fall into poor naming
conventions, even for scripts. For instance, how many times have you
worked on scripts that was named my_script_v1.py or
my_script_final_version.py? What were your main challenges
with this approach, and what alternative solutions can you think of to
circumvent this naive approach?
Semantic Versioning
The answer the question above is based on a concept called
versioning. Versioning is the practice of assigning unique
version numbers to different states or releases of a given package to
track its development, improvements, and bug fixes over time. The most
popular approach for software packaging is to use the Semantic Versioning framework, and can be
summarised as follows:
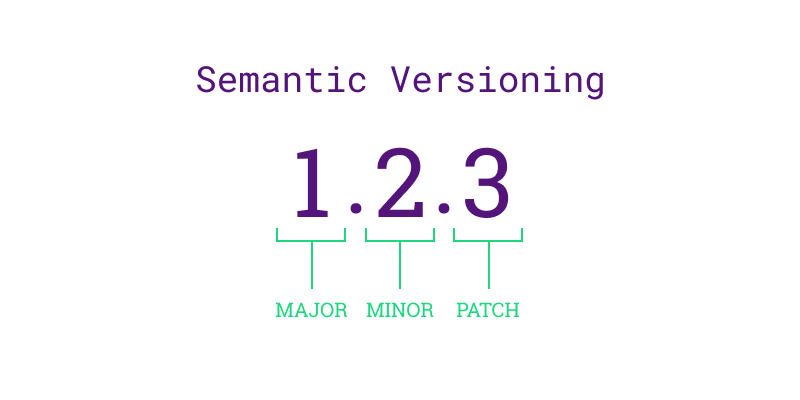
Given a version number X.Y.Z, where X is the major version, Y is the minor version and Z is the patch version, you increment:

X when you make incompatible API changes,

Y when you add functionality in a backwards compatible manner,

Z when you make backwards compatible bug fixes.
Recall: API
An Application Programming Interface (API) is the name given to the way different programs or parts of a program to communicate with each other. It provides a set of functions, methods that can be used to interact with a piece of software or data services. Commonly, APIs are used within web-based applications to enable users to receive information from a given service, such as logging into social media accounts, creating weather widgets, or finding geographical locations.
The first version of any package typically starts at 0.1.0, and any
changes following the semantic versioning rules above results in an
increment to the appropriate version numbers. For example, updating a
software from version (0.1.0) to (1.0.0) is called a
major release. Version (1.0.0) is commonly
referred to as the first stable release of the package.
An important point to highlight is the semantic versioning guidance above is a general rule of thumb. Exactly when you decide to bump the versions of your package is dependent on you, as the developer, to be able to make that decision. Developers typically take the size of the project into account as a factor; for example, small packages may require a patch release for every individual bug that is fixed. On the other hand, larger packages often group multiple bug fixes into a single patch release to help with tractability because making a release for every fix would accumulate in a myriad of releases, which can be confusing for users and other developers. The table below shows 3 examples of major, minor and patch releases developers made for the Python language itself.
| Release Type | Version Change | Description |
|---|---|---|
| Major Release | 2.0.0 to 3.0.0 | Introduced significant and incompatible changes, such as the print function and new syntax. |
| Minor Release | 3.7.0 to 3.8.0 | Added new features like the walrus operator and positional-only parameters, backward-compatible. |
| Patch Release | 3.8.0 to 3.8.1 | Fixed bugs and made performance improvements without adding new features or breaking changes. |
Pre-release Versions
Pre-release versions in semantic versioning are versions of the software that are still in development or testing before a stable release. They are denoted by appending a hyphen and a series of dot-separated identifiers to the version number, such as 1.0.0-alpha or 1.0.0-beta.1. These versions allow developers to release early versions for testing and feedback while clearly indicating their status.
Once we publicly release a version of our software, it is crucial to maintain consistency and avoid altering it retroactively. Any necessary fixes needs to be addressed through subsequent releases, typically indicated by an increment in the patch number. For instance, Python 2 reached its final version, 2.7.18, in 2020, more than a decade after the release of Python 3.0. If the developers decided to discontinue support for an older version, leaving vulnerabilities unresolved, they would have to transparently communicate this to their users and encourage them to upgrade.
Challenge 1: Semantic Versioning Decision Making
Imagine you are a developer working on a library called
DataTools, which provides various utilities for data
manipulation. The library uses semantic versioning and is currently at
version 1.2.3. You have implemented a new feature that adds support for
reading and writing CSV files with custom delimiters.
According to semantic versioning, should you bump the version to
1.3.0, 1.2.4, or 2.0.0? Explain
your reasoning.
Think about whether the new feature introduces any breaking changes for existing users.
According to semantic versioning, since the new feature adds
functionality in a backward-compatible manner, the version should be
bumped to 1.3.0. This signifies a minor version
increase.
Versioning vs Version Control
Note; although they share similarities, you should not confuse software versioning and version controlling your software. The table below outlines some similarities and differences to help you differentiate them:
| Aspect | Version Control | Versioning |
|---|---|---|
| Purpose | Tracking changes, enhancing collaboration, and maintaining a history of revisions | Differentiating between various stages of software development or releases, ensuring clear identification of updates and changes |
| Features | Branching, conflict resolution, merging | Version numbering, compatibility guidelines, and release notes |
| Example | Git | Semantic Versioning |
| Benefits | Collaboration, code integrity, and project management | Communication of changes (major, minor, patch), transparency, and compatibility |
| Challenges | Managing conflicts and merges with multiple contributors, ensuring training for teams, and integrating within existing processes | Ensuring backward compatibility and avoiding confusion with version numbers that accurately reflect the changes |
Versioning is crucial for tracking the development, improvements, and bug fixes of a software package over time. It ensures that changes are documented and managed systematically, aiding in reproducibility and reliability of the software.
Versioning enables users to track code changes and dependencies, allowing reliable recreation of specific software versions, and further aiding the reproducibility of your software.
Content from Publishing Packages
Last updated on 2026-06-08 | Edit this page
Overview
Questions
- How can I make my software easily accessible to a general audience?
Objectives
- Become familiar with using GitHub to host software packages
- Learn how to publish Python packages on PyPI
- Learn how to publish R packages on CRAN
Finishing touches
README
You’ve created a package that conforms to your programming language’s standards that provides functionality that might be useful to others. This is the point at which you can start to think about releasing and publishing your software once some housekeeping has been taken care of.
Firstly, all packages must contain a README.md file that
explains what the project is, how users can install it and how they can
use it. A good example of a README.md file may look
something like:
# My Project

My Project is a simple utility tool designed to perform basic operations on text files.
Whether you need to count words, find specific phrases, or extract data, this tool has you covered.

## Installation

You can install My Project via pip:

$ pip install my-project

## Usage

from my_project import text_utils

text = "Lorem ipsum dolor sit amet, consectetur adipiscing elit."
word_count = text_utils.count_words(text)
print("Word count:", word_count)

This will output:

Word count: 9
Notice that the README.md should be included at the top
level of our project directory.
In R, README.md can be automatically generated from an
Rmarkdown README.Rmd file, allowing your example outputs to
be generated directly from the code.
Refer to the usethis documentation for further details.
In the README.md file, developers also usually include
in a “contributing” section for new users that are typically outside of
the project. The purpose of this section is to encourage new developers
to work on the project, while ensuring they follow the etiquette set by
the project developers. This may look something like:
### Contributing

Contributions to My Project are welcome! If you'd like to contribute, please follow these steps:

1. Fork the repository.
2. Create a new branch for your feature (git checkout -b feature/new-feature).
3. Make your changes and ensure tests pass.
4. Commit your changes (git commit -am 'Add new feature').
5. Push to the branch (git push origin feature/new-feature).
6. Create a new Pull Request.
Licensing
Following this, it is essential for your software to have a license to emphasise to users what their rights are in regards to usage and redistribution. The purpose of this is to provide the developer with some legal protections, if needed. There are many different open source licenses available, and it is up to the developer(s) to choose the appropriate license. You can explore alternative open source licenses at www.choosealicense.com. It is important to note that your selection of license may be constrained by the licenses of your dependencies.
The most common license used in open source projects is the MIT license. The MIT license is permissive, which allows users to freely use, modify, and distribute software while providing a disclaimer of liability.
The MIT License has the following terms:
Copyright (c)
Permission is hereby granted, free of charge, to any person obtaining a copy of this software and associated documentation files (the “Software”), to deal in the Software without restriction, including without limitation the rights to use, copy, modify, merge, publish, distribute, sublicense, and/or sell copies of the Software, and to permit persons to whom the Software is furnished to do so, subject to the following conditions:
The above copyright notice and this permission notice shall be included in all copies or substantial portions of the Software.
THE SOFTWARE IS PROVIDED “AS IS”, WITHOUT WARRANTY OF ANY KIND, EXPRESS OR IMPLIED, INCLUDING BUT NOT LIMITED TO THE WARRANTIES OF MERCHANTABILITY, FITNESS FOR A PARTICULAR PURPOSE AND NONINFRINGEMENT. IN NO EVENT SHALL THE AUTHORS OR COPYRIGHT HOLDERS BE LIABLE FOR ANY CLAIM, DAMAGES OR OTHER LIABILITY, WHETHER IN AN ACTION OF CONTRACT, TORT OR OTHERWISE, ARISING FROM, OUT OF OR IN CONNECTION WITH THE SOFTWARE OR THE USE OR OTHER DEALINGS IN THE SOFTWARE.
Both R and Python have a section in their corresponding metadata
files for linking the LICENCE file:
R’s DESCRIPTION file can be updated with the name of the
licence and a reference to the file automatically by using the
usethis::use_mit_license() or similar function (as
described in the Creating R Package
episode)
License: MIT + file LICENSEWhile Python’s pyproject.toml has a license
field for the same purpose.
Releasing software on GitHub
Once you have prepared all of the material above, you will be in a good position to release your software to a wider audience. Given that you already hopefully using version control (see the course for further details), you will already have access to a platform for hosting your software, as both R and Python can install packages from Git hosting providers, including GitHub.
In R the pak package is needed to install packages from
GitHub, in the format username/repository. This is very
common practice as the large overhead to host packages on CRAN means
many developers either solely host their package on GitHub or will host
development versions on it.
R
pak::pak("tidyverse/dplyr")
In Python this practice is less common for large packages but it is a perfectly valid route if you do not wish to host your package on PyPI.
If you are using GitHub to host your code, any new releases of your software should be explicitly ‘tagged’. Tags are a way of permanently tagging a specific point in your repository’s history, which can be used to denote a version that is suitable for others to use. A tag is an immutable reference to a commit (or series of commits), making it simple to identify specific versions of a software, and the tags are commonly identified in conjunction with the Semantic Versioning framework (e.g. v1.0.0). For more information about how GitHub uses tags for software releases, see releases.
Tagging a release on GitHub involves going to your repository’s page, clicking on the ‘Releases’ link on the right hand navigation bar, and following the steps to Draft a New Release by creating a new tag with the appropriate version number. Others can then install your package referencing specific releases.
Automating releases
GitHub Actions, introduced in the Testing and Continuous Integration lesson can also be used to automatically generate releases based on certain conditions - for example a tag being pushed that fits a certain format.
Remember to never publish any sensitive information, such as passwords, directly on GitHub. Storing sensitive data in your repository makes it publicly accessible (if your repository is public) or easily accessible to anyone with repository access (if private). This can lead to unauthorised access, security breaches, and potential misuse of your code. Instead, use should use GitHub Secrets or environment variables to securely manage the sensitive information, ensuring it is kept safe and only accessible by authorised collaborators or workflows.
Publishing to PyPI
PyPI (or the Python Packaging Index)
is the official package repository for the Python community. It serves
as the central location where developers can publish and share their
packages, making them easily accessible to the wider community. When we
use pip to install packages from the command line, it
fetches them from PyPI by default. Uploading your packages to PyPI is
recommended if you want to distribute your projects widely, as it allows
other developers to easily find, install, and use your software.
Developers often use TestPyPI for testing and validating packages before they are officially published on PyPI.
To publish packages to PyPI two tools are needed:
-
build, which is a command-line tool used to build source distributions, and wheel distributions of Python projects based on the metadata specified in thepyproject.toml. -
twineis the tool we use to securely upload the built distributions to PyPI, which handles tasks like authentication and transfer of package files.
These are both Python packages and can be installed by
pip.
Running build will create
dist/your-project-name-1.0.0.tar.gz (source distribution)
and dist/your-project-name-1.0.0-py3-none-any.whl (wheel
distribution) in the dist directory.
Next, we can use twine to a) validate the build and b)
upload the package to TestPyPI to test everything is in order.
Once we have confirmed that everything works as expected on TestPyPI, we may proceed with installing our package to PyPI:
Finally, once our package is available on PyPI other users can
install it using the regular pip command:
As with package development, uv also offers tooling for
publishing without requiring the installation of any further
dependencies. In particular it has build and
publish commands that handle these two steps - provided
uv was set as the build-backend in
pyproject.toml.
Publishing to CRAN
Publishing a package to CRAN is a very different matter to PyPI. Whereas PyPI acts as an unregulated market where users can upload packages without any restrictions on their content, CRAN functions more akin to a boutique with a gatekeeper. Any candidate packages must follow a stringent list of checks, including but not limited to:
- Validating metadata (even down to ensuring the punctuation requirements are met)
- The documentation builds
- All tests pass
These checks will be run on both the latest release of R and the
upcoming development version across all major operating systems, and
will be run periodically if your package is accepted on CRAN with your
package being at risked of being removed if it fails to fix any issues
that appear. Finally, all submissions will be assessed by human
reviewers. The submission process can be started via
devtools::submit_cran() which will interactively step you
through all the criteria and automate the process of building and
uploading your package.
Given that R packages can be installed from GitHub very straightforwardly, why might you consider jumping through all the additional hoops for CRAN? Essentially because it offers users of your software confidence that the package will run exactly as described and it meets a minimum threshold of quality. This isn’t to say that CRAN is always the right choice - for many small pieces of work GitHub will be a perfectly valid option.
- R and Python packages can both be installed directly from GitHub
- GitHub allows you to create named releases using tags
- You can easily publish your package on PyPI for the wider Python
community, allowing your users to simply install your software using
pip install. - Publishing a package on CRAN is a thorough process with a manual review